Overview
As we know that Google Analytics is vital for our customers’ businesses, we’ve integrated it within cognitiveSEO. No more switching between tools, no more wasted time with mixing and matching results and comparisons. We are making it possible for you to use Google Analytics straight from our cognitive tool.

Add Google Analytics Widgets
You can choose to add Analytics Widgets to your Dashboard or to the Reports & Schedules section. The widgets are the same for both cases and once you press the “Add widget” button a po-up like the one below will appear in the Dashboard and as well in the Reports& Schedules section.
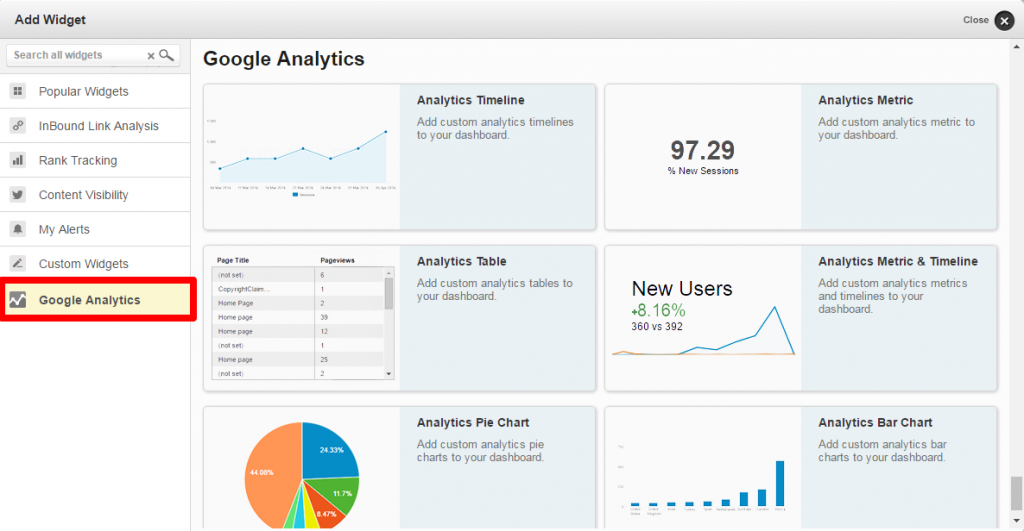
In both cases you can choose between six types of widgets:
- Analytics Timeline
- Analytics Metric
- Analytics Table
- Analytics Metric & Timeline
- Analytics Pie Chart
- Analytics Bar Chart
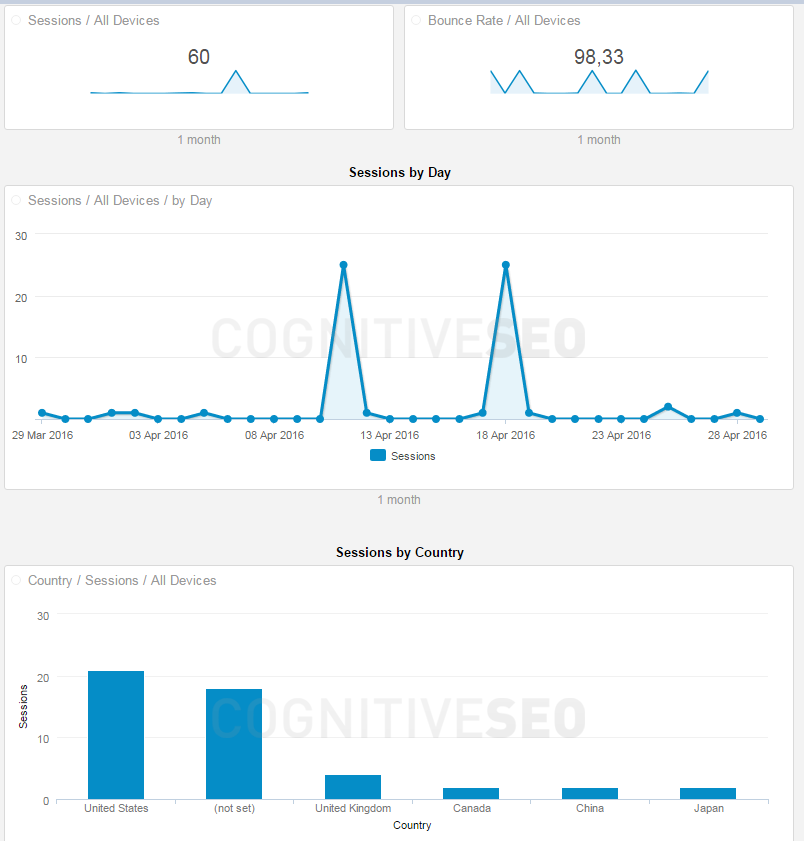
Each of these widgets has such a high level of personalization that out of them hundreds of combinations can be made. From pie charts to tables and bar charts, any of your Google Analytics data can be displayed directly on your cognitiveSEO account. In the screenshot below you can see some widgets examples. For more Google Analytics Widgets examples please go here.
Add Google Analytics Widgets to Dashboard
Adding a new widget to Google Analytics is simple. Just go to Dashboard – Add Widget.
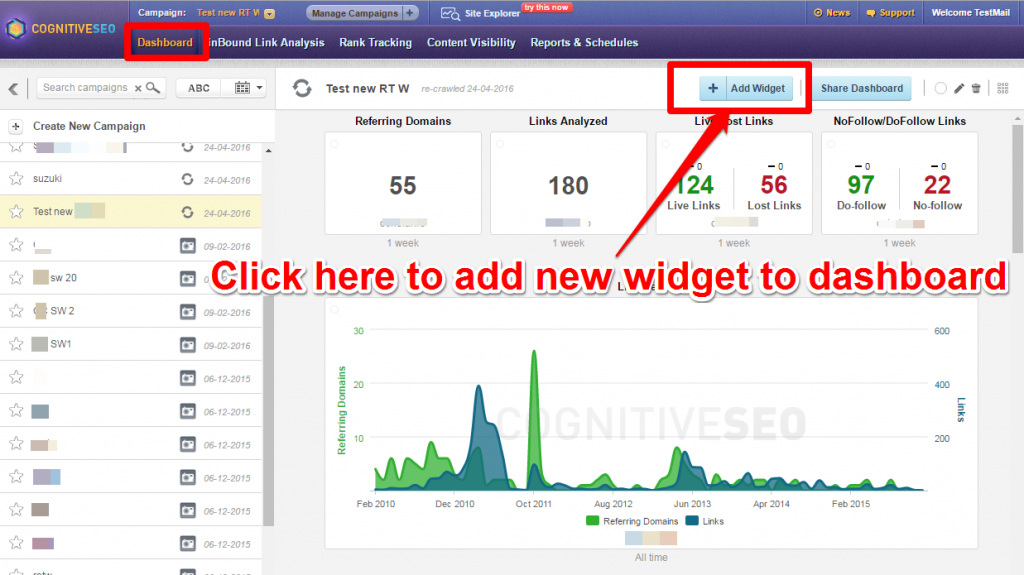
Once you’ve pressed the Add Widget button a pop-up similar with the pop-up from above will appear where you can choose between the 6 types of widgets mentioned above.
Add Google Analytics Widgets to Reports& Schedules
Once you go to Reports& Schedules section, if you don’t have reports added to your campaign, a pop-up similar to the one below will appear.
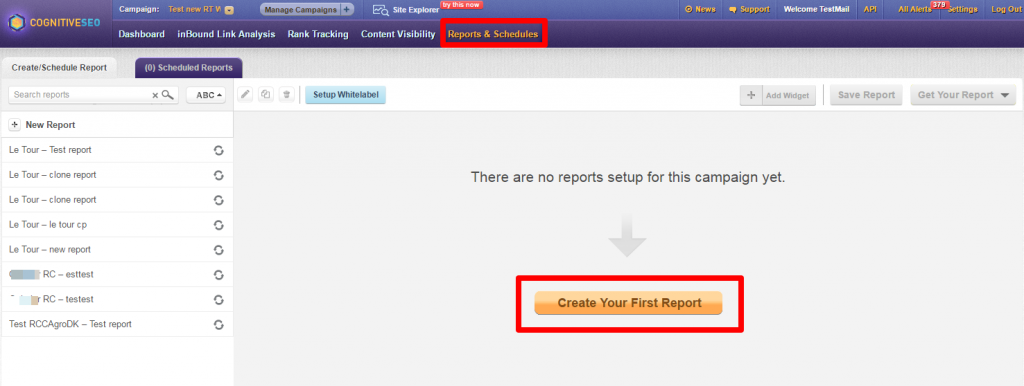
Once you click on creating a report, you will be given two possibilities: creating a report from scratch or to use a template. You can find more about creating reports from scratch here. If you choose to use a template, you have the possibility to use a template dedicated to Google Analytics reporting. Of course, this template can be customized as well.
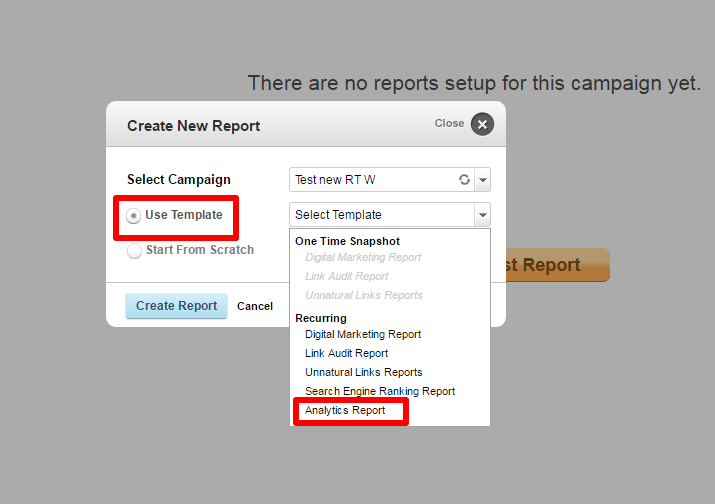
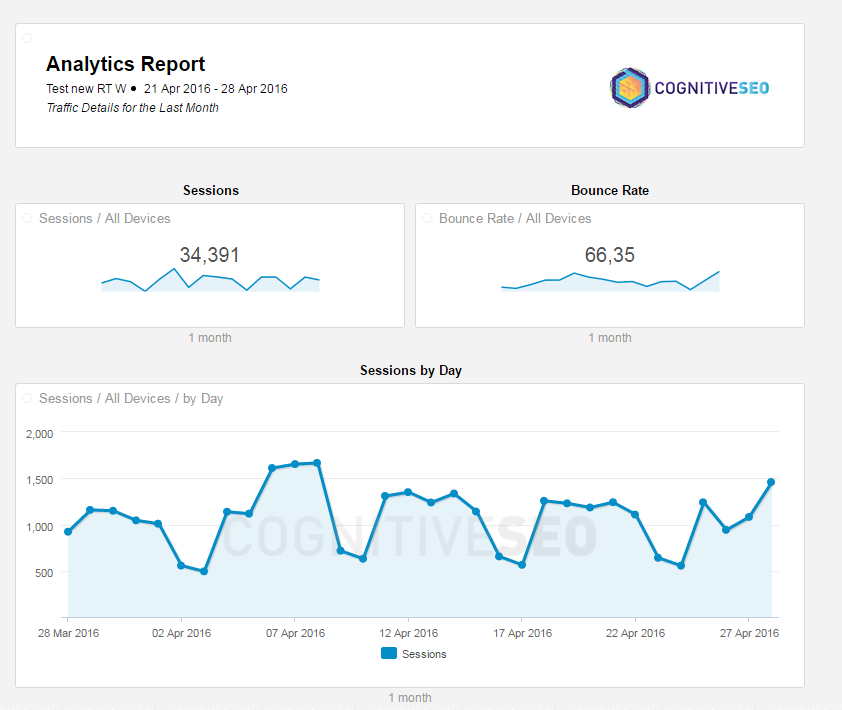
Analytics Reports can be generated from Recurring campaigns only. Below you have an example of how a part of an Analytics Report could look like. As mentioned above, this template will give you widgets on Google Analytics only. However, any widget regarding any other metric from cognitiveSEO can be mixed into this report.
Google Analytics Widgets Customization
We allow you to fully customize all the widgets from cognitiveSEO, Google Analytics included. You are the one who decides which data you want to see exactly, the period of time you are interested to get the data from or the device you are interested to analyze the data for. All of these and many others personalization options are available for any Google Analytics widget. You can choose to customize the widgets in the moment you add a new one or afterward.
When you add a widget you will get several personalization options, just like in the image below. The widgets are highly customizable and for each of them you will get many personalization options.
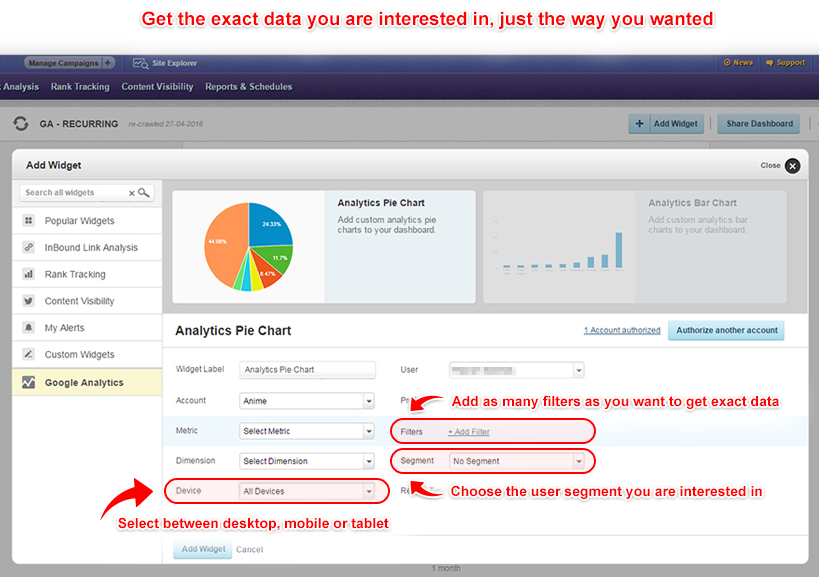
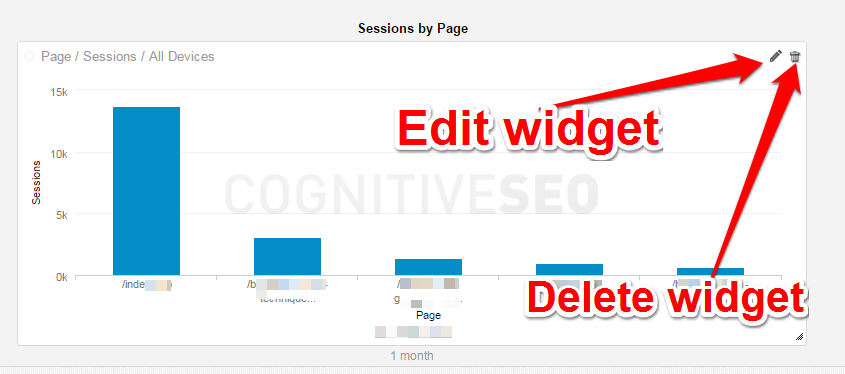
If you want to customize a widget after you’ve added it, you can do that by pressing the Edit icon. Once you’ve press Edit a pop-up similar to the one above will appear and you will be able to make all the wanted personalizations from there.
Near the edit icon, you will find the trash can icon where you can delete the widget from.
Google Analytics Authorization Management
Authorizing your Google Analytics account is a vital step in order to visualize data from your Analytics account directly into cognitiveSEO.
You can easily authorize and de-authorize your account and you can also manage your sub-users access to Analytics data.
Authorize Your Google Analytics Account
Once you enter your account, if you want to add a Google Analytics widget and your account is not authorized yet, all of your Analytics widgets will look like in the screenshot below.

Once you click on “Authorize” button, a pop-up like in the screenshot below will appear. You need to know that once you authorize your account, all of your Google Analytics widgets will be showing data.
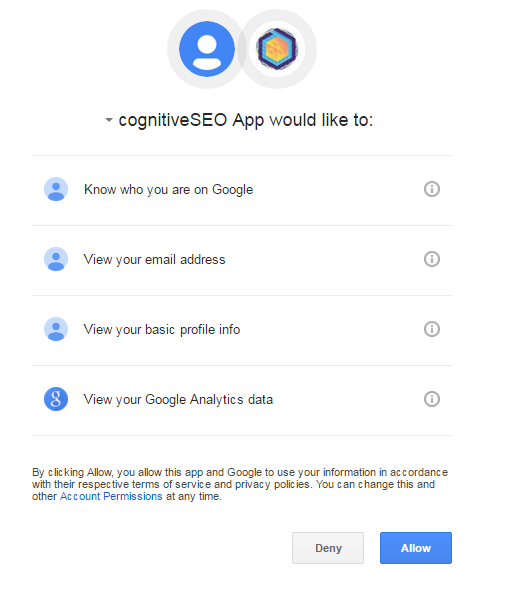
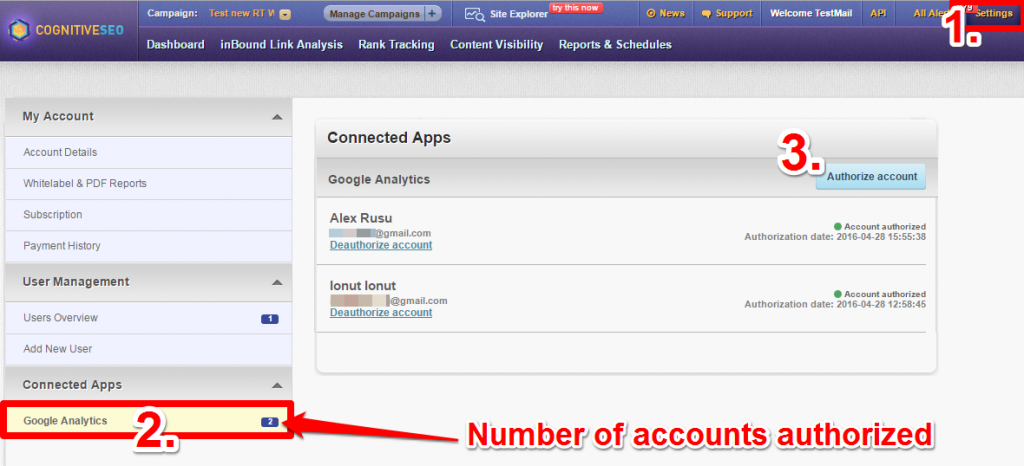
There is no limit in terms of number of Google Analytics accounts authorized. You can authorize a new account by first going to Settings – Google Analytics – Authorize Account.
De-Authorize Your Google Analytics Account
To de-authorize a Google Analytics account you should go to Settings – Google Analytics – De-Authorize Account.
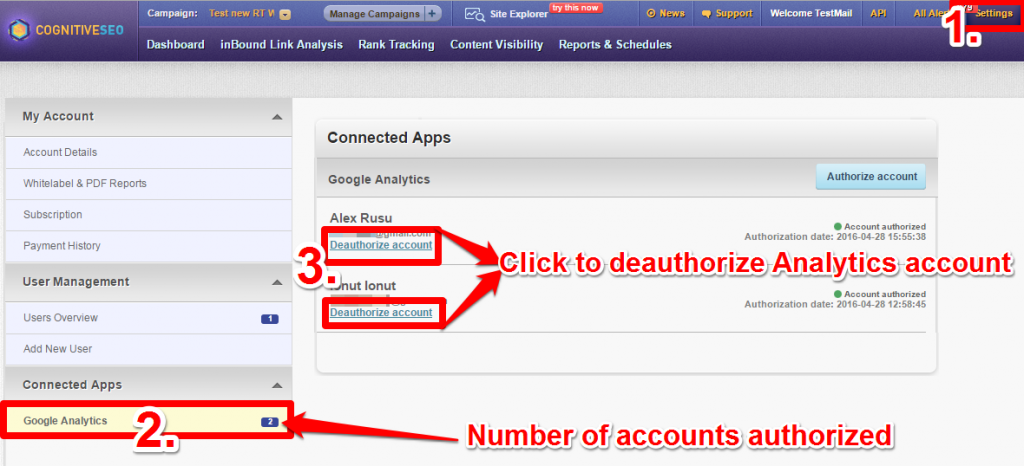
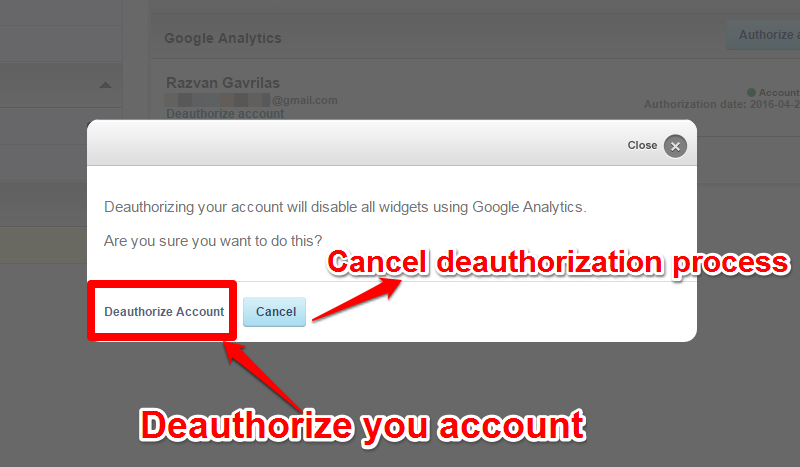
Once you click on “Deauthorize account” a pop-up similar to the one below will appear on the screen. If you want to deauthorize your account, meaning disable all the widgets using Google Analytics, click on the Deauthorize Account button. If you want to cancel the deauthorization process, simply click on Cancel.
User Management
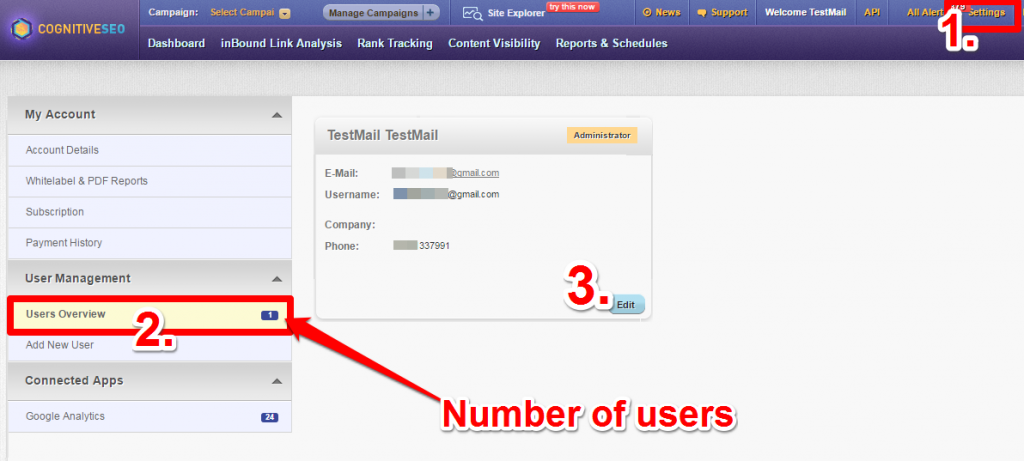
You can easily manage your users’ access to Google Analytics. Simply go to Settings – User Overview – Edit.
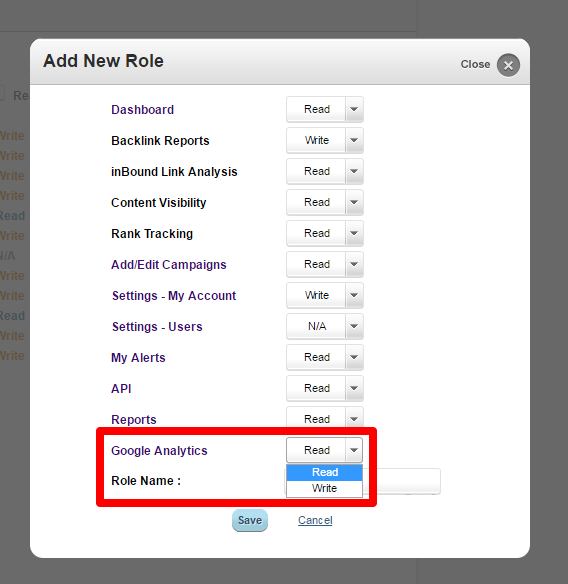
Once you press Edit a pop up similar to the screenshot below will appear. You can press Add New Role button to add new user roles or to change existing ones.
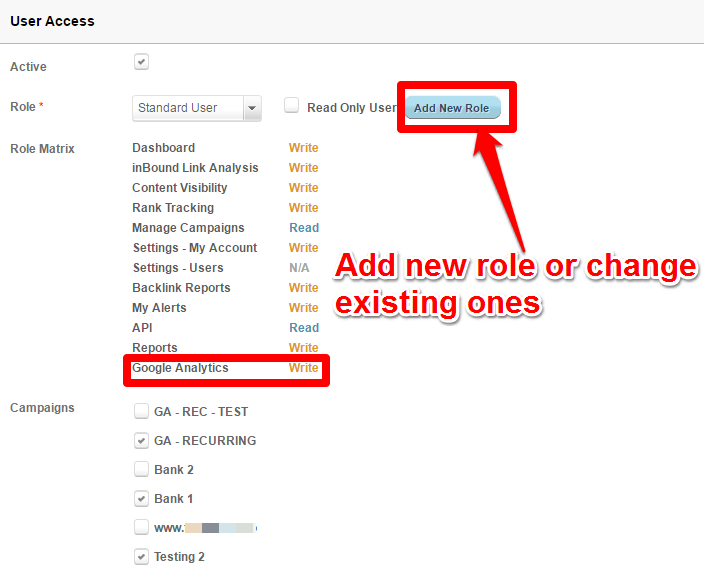
On “Add New Role” category you can set specific user’s rights. From here you can allow your users to write or only read the Google Analytics data. Once you’ve made the changes, hit Save. To revoke the changes, hit Cancel.
