Table of Contents
Reports & Schedules
Overview

The Reports & Schedules module allows you to easily create fully customizable reports that you can share with your team and clients. You can also schedule your reports to be automatically sent on a weekly or monthly basis on your behalf, tailored after your client’s needs. You can access this module by pressing the Reports & Schedules tab or by going to the PDF report icon, as you can see in the screenshot below. When you hover on the PDF icon, two options will be available for you : build your report (you will automatically be sent to the Reports & Schedules module) or instant download (a PDF report containing data from the page will be downloaded).

Create Report
You have two possibilities for creating a report: from scratch or from a predefined template, as you choose. For both of the options, you need to select a campaign you want your report to be created for.

When selecting a campaign, you can easily see what type of campaign is it, a one time snapshot or a recurring one as each of them are marked accordingly with an icon near their name, just like in the screenshot below.
![]()
1.Create New Report from Scratch
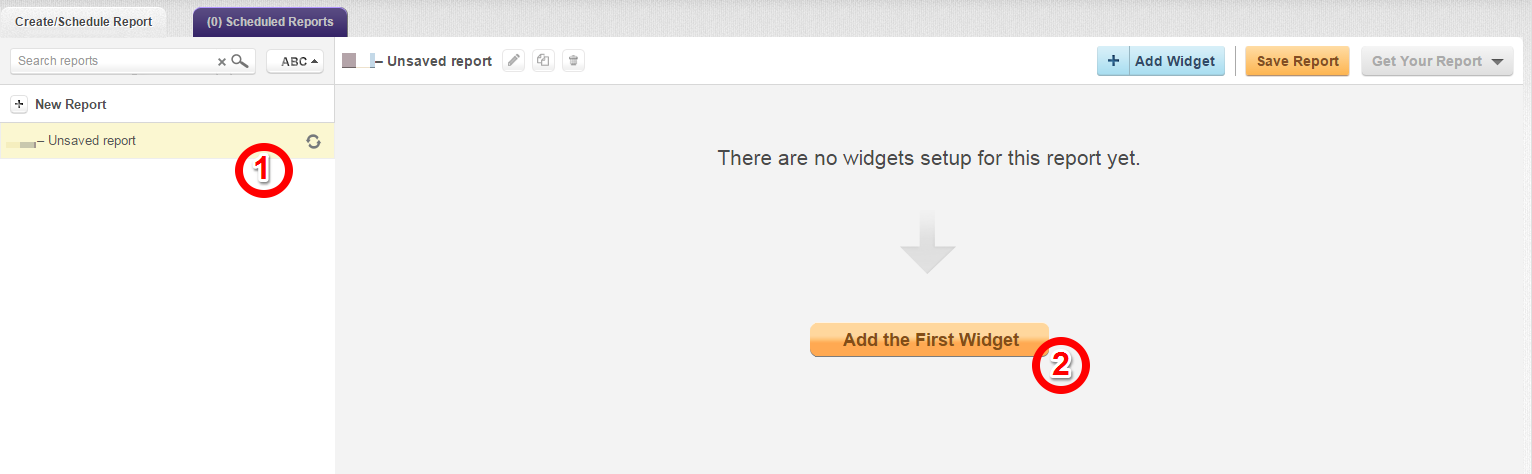
If you choose to create a report from scratch, an image like the screenshot above will appear.
- On the left side you will be informed with the name of the campaign the report is being done for and also “Unsaved Report” will be listed. Once you save the report, you will be giving a name to your report, name that will appear instead of “unsaved report”.
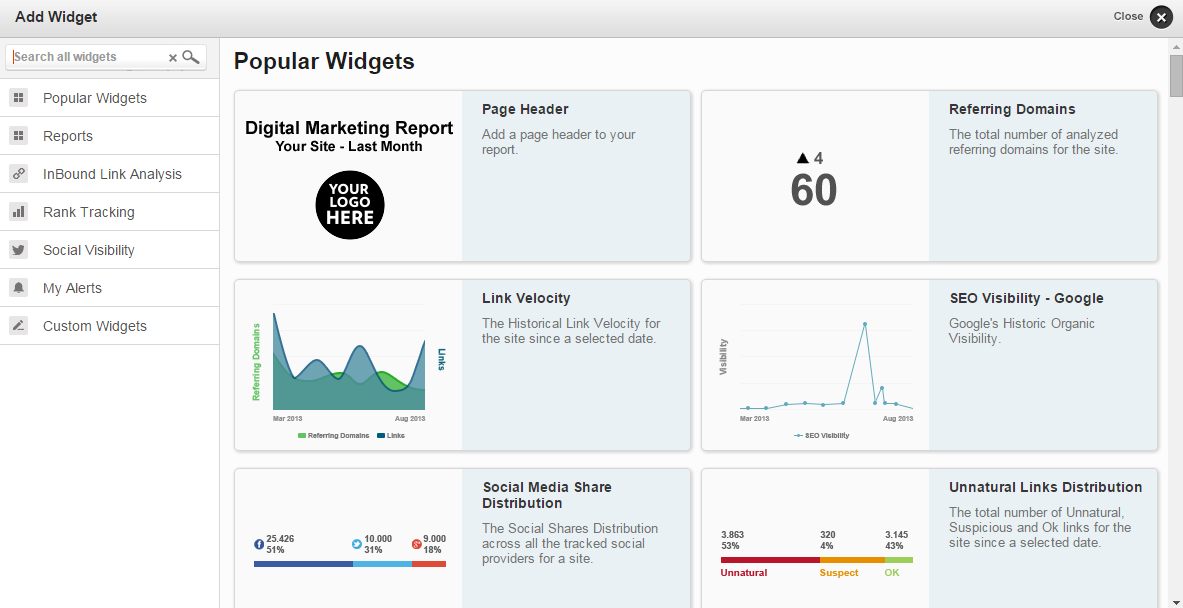
- From the “Add the First Widget” button you can add your first widget for your newly created report. Once you press that button, a pop up with several widgets from you can choose from will appear, just like in the image below. You can add whatever widget you find useful for your report. More info about each widget can be found here.
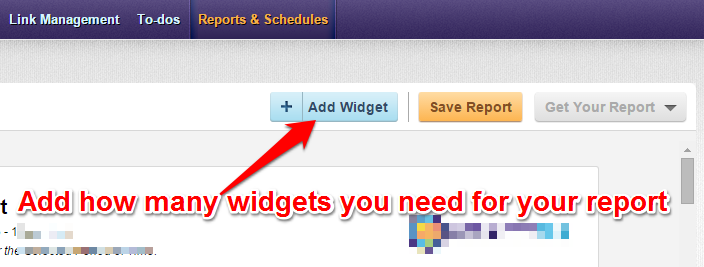
You can add how many widgets you want, anytime you want by pressing the “Add widget” button.
Page Header
In order to better personalize your report, we recommend you to add a Page Header, a widget that can be found among the widget list, at Reports category.
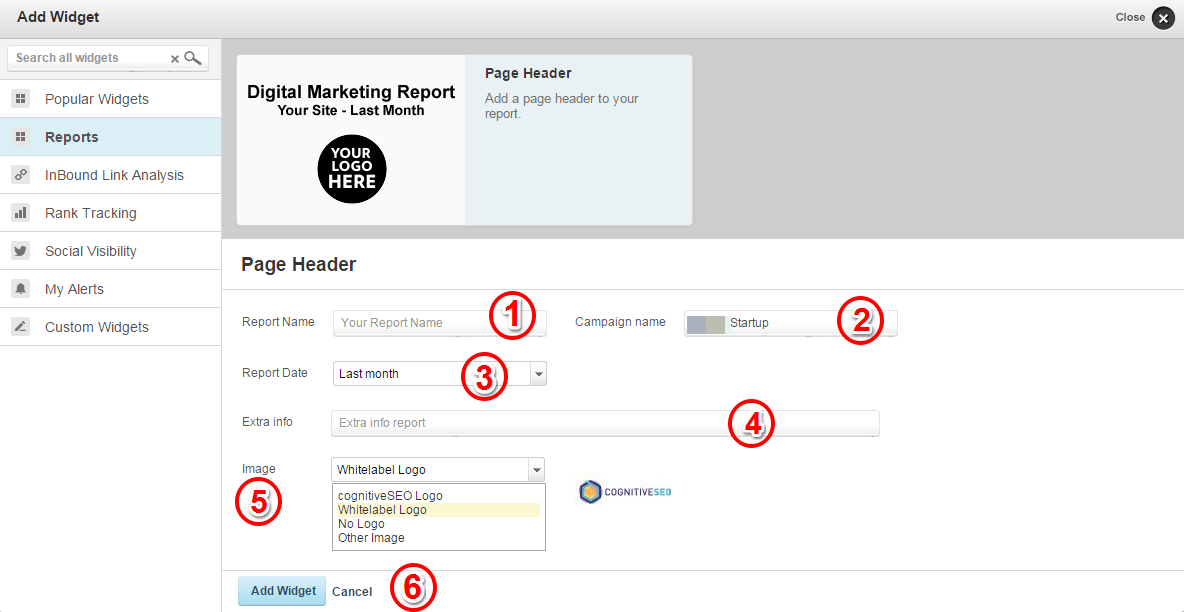
- Report name – Here you can personalize your report by adding a name of your choice.
- Campaign name – By default, here you will be listed the campaign name the report is being made for. Yet, you can change this name just the way you want.
- Report Date – Here you can choose the period you want the report to be made for. You can choose between last week, last 2 weeks, last month, last 2 months, last 3 months, last year, last 2 years, all time or custom time.
- Extra info – You can add extra explanation about the report, info that your clients or team may find useful.
- Image – On the report header you can have whatever image you’d like. You can choose the cognitiveSEO logo, whitelabel logo (the one that you’ve previously set), no logo or any other image. This feature allows you to put a different image on each report that you generate.
- Add widget/Cancel – You can add the widget with the data that you’ve added or you can cancel all the changes.
2. Create New Report from Template

- Select Campaign – Select the campaign you want to create the report for.
- Select Template – Select the desired template. Depending on the campaign you’ve chosen, one time snapshot or recurring one, you will be able to choose from certain templates.
- Create report/Cancel– You can confirm the creation of the report by pressing “create report” button or you can cancel it, by clicking on “cancel”.
Below you have a snipping of how reports created from templates could look like.
You can create dedicated Google Analytics reports. Find out more about them here.

Just like in creating a report from scratch, you can personalize your report by adding how many widgets you want, anytime you want by pressing the “Add widget” button.
3.Edit Widgets
The widgets are very functional and flexible to work with.
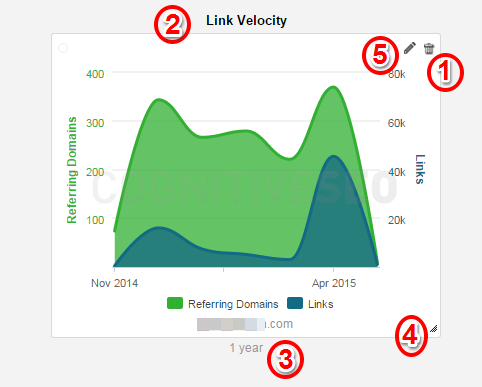
- Delete Widget – This icon will allow you to delete the widget.
- Move the Widget – From this area you can move the widget around. In order to move a widget, you need to click and hold the cursor on the header of a widget. Next, you just have to drag the widget to the desired location.
- Time – Here you have the period of time for which the data are displayed. You can also change the period of time by clicking on the text.
- Resize and Multiple Selection– You can also resize the widget window to a custom size. To do so, you need to click on the bottom-right corner of the widget window and drag it to the desired dimension. You can choose to select multiple widgets in the same time by dragging the cursor over the widgets you want to select. Once selected, you can resize them and move them around.
- Edit – This button lets you edit certain aspects of the widget as you can see in the screenshot below:

- 1. Change the targeted website from which the data are extracted
- 2. The reload time for the data – You can set at how many minutes the information from the widgets is refreshed.
- 3. Change the label of the widget
- 4. Save or cancel the changes you’ve made.
3.Manage Reports

1. Search Reports – here you can type a name or a part of the name of a report in order to find it easier among your list of reports.
2. List Reports Alphabetically – you can choose to have the list of reports displayed from A to Z or from Z to A.
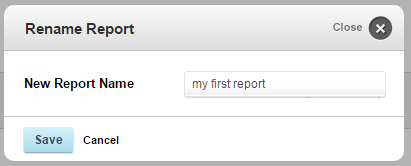
3. Rename Report– here you can choose to change the name of the report. Once you click this button, a pop up like in the image below will appear and there you can make the wanted changes.
4. Clone Report – cloning reports is a great feature that allows you to copy the elements that you have on an existing report to another report for a campaign of your choice. This means that if you’ve already created a report for a campaign and you want to use the same type of report for other campaigns too, all you need to to is clone it and all the widgets that you’ve added will appear in the new report, containing the already used widgets but with the data extracted from the campaign that you’ve chosen. Below you have a screenshot with the clone report pop-up. There, you can choose the campaign you want to clone your report for and the report name.

5. Delete Reports – This button allows you to delete any report. By deleting a report, any attached schedules will be also deleted.
6.Add Widget – By pressing this button you can add how many widgets you want, anytime you want.
7.Save Report – This button allows you to save your current work, by saving your reports. Not saving your report will not give you the possibility to get your report, be it via email, pdf, etc.
8.Get Your Report – You are given 3 possibilities or getting your report:
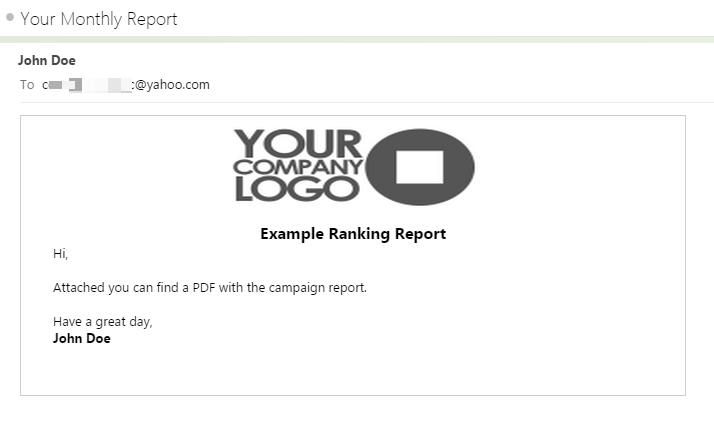
- Email – You can instantly send your report via email. You can choose from whom you want the mail to be sent from, the name of the sender, the emails you want to send the report to, the email subject, a certain message that you want to add to the mail (if you don’t want to add a certain message, a default one will be sent) and the type of report you want to send. Regarding the type of report you want to send, you can choose from a PDF file (the receiver will get a mail with a PDF file attached) or a shareable link (the receiver will get a URL where he will be able to visualize the report in a read only format ).

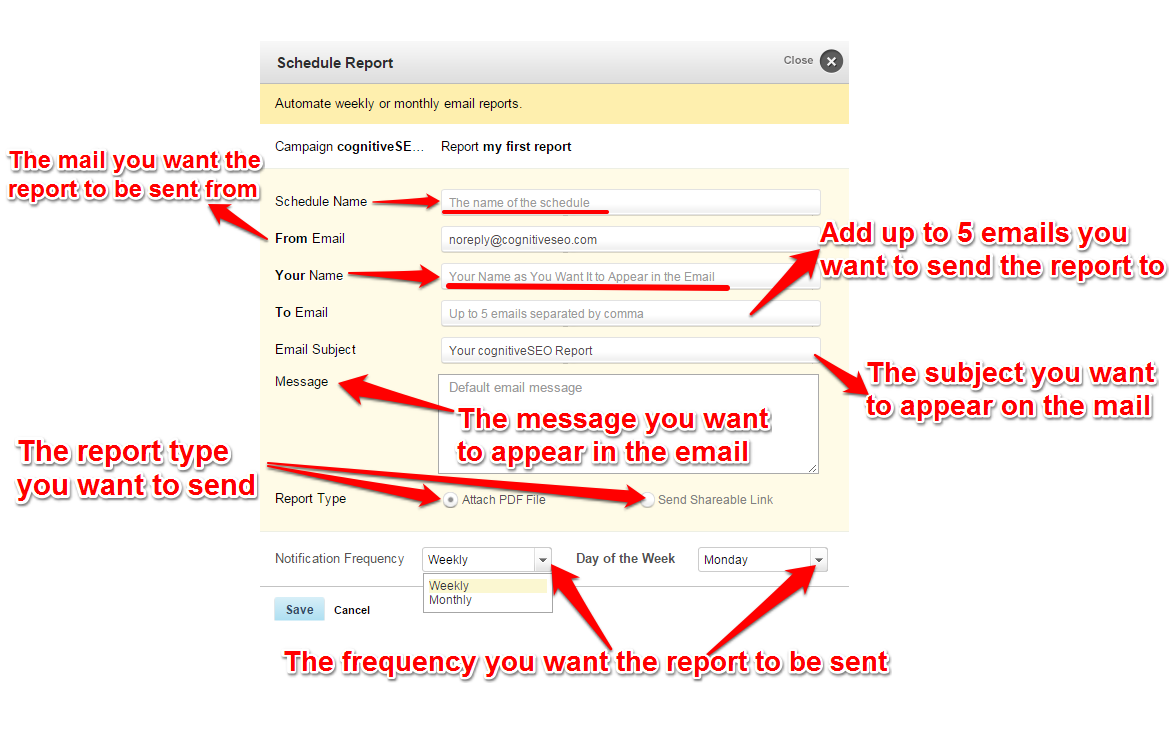
Below you have an example of how a reporting email could look like.
- Schedule Reports – In order to keep your clients informed on the status of your digital marketing campaign, you can schedule your reports to be automatically sent on a weekly or monthly basis on your behalf, tailored after your client’s needs. You can fully personalize your schedule by giving it a name, choosing on behalf of whom should the mail be sent, to whom it should be delivered (up to 5 emails), which message should the mail contain (if you don’t want to add a certain message, a default one will be sent) and which type of report should be sent, an attached PDF file or a shareable link. If you choose the reports to be sent weekly, you can choose the day of the week when you want the reports to be sent. If you want the reports to be sent monthly, you can choose the day of the month you want the reports to be sent.
- Share via Link – Aside from emails and schedules, you can also share the reports with your team members and other relevant audiences by generating a link where the document can be accessed in a read only format. By choosing this feature, a pop-up like the image below will appear.

9. New Report – You can create a new report any time, by clicking this button.
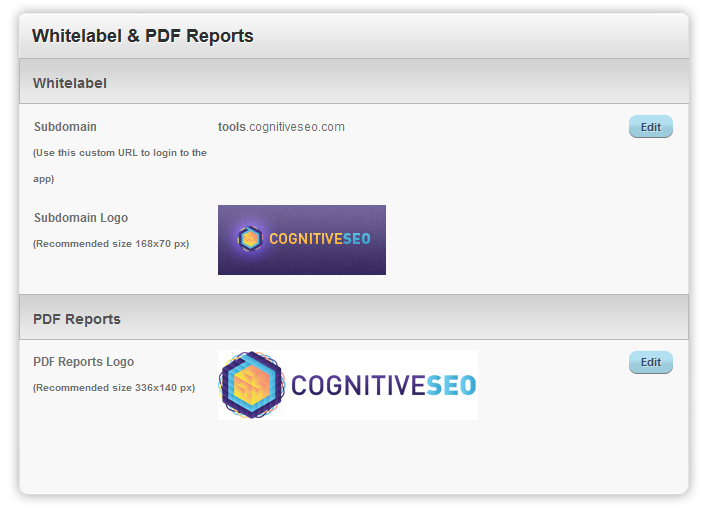
Whitelabel – You can setup your whitelabel just by clicking the button emphasized in the screenshot below.

Pressing this button, you will be redirected to the settings category, just like in the screenshot below, where you can set up a “white-label” on the entire account. White-label is a neat option that allows you to rid your reports and screens of the cognitiveSEO logo and upload your own logo, in case you want to present reports and live data to your own clients. The sub-domain can also be changed to a name of your choice. These changes are manually approved by the CognitiveSEO team. If you opt to change both sub-domain and logo, the cognitiveSEO watermarks will no longer appear on the charts.
Scheduled Reports
On this category, you can manage the reports that you’ve scheduled.

1.Schedule a Report
Scheduled reports give you the possibility to send automated reports, on whatever dates you want, to up to 5 emails, with a frequency on your choice. In order to schedule a report, you need to go to Create/Schedule Report Tab – Get Your Report – Scheduled category. All this process is explained above.
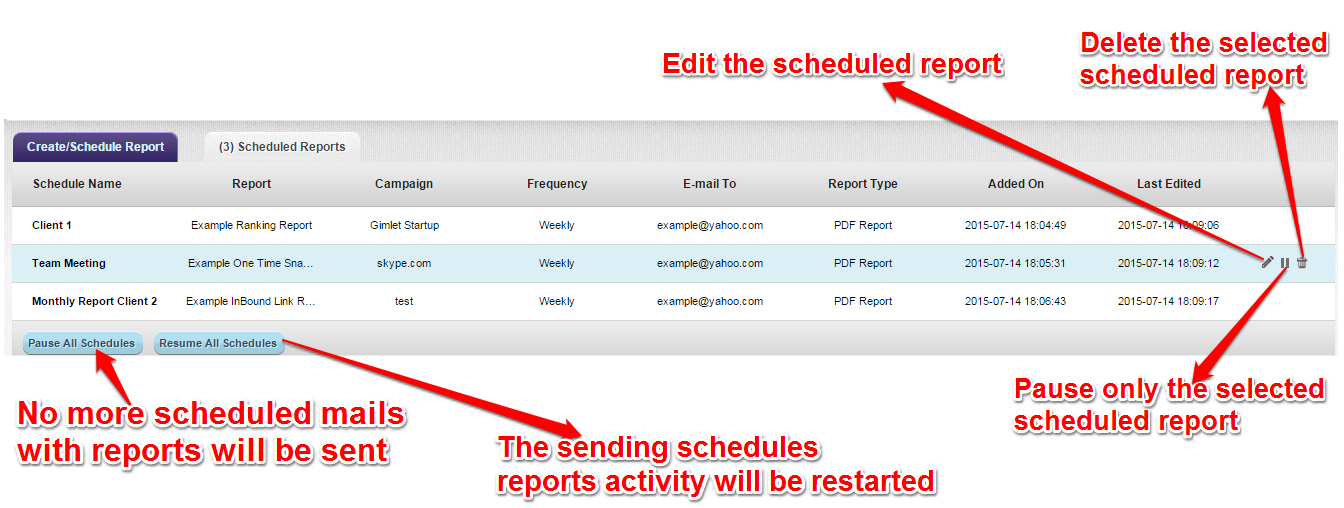
2.Manage Scheduled Reports
On this category you can manage the already scheduled reports. You can choose to apply actions to all scheduled reports, by pausing or resuming all of them. You also have the possibility to apply actions to individual scheduled reports, by editing, pausing or deleting them.