Table of Contents
Overview
Alerts are an important and yet simple tool that allows you to monitor the most important factors for your SEO campaigns. They help you to easily manage your brand and reputation, to monitor your competitors and they also have the great advantage of being time savers. Alerts saves you the hassle of having to go through hundreds of links and rankings looking for information that is important to you. You can use triggers and alerts in order to receive information that is relevant to you or your company. If alerts keep you up to date, the triggers are parameters according to which you can set up the alerts.
Creating new alerts
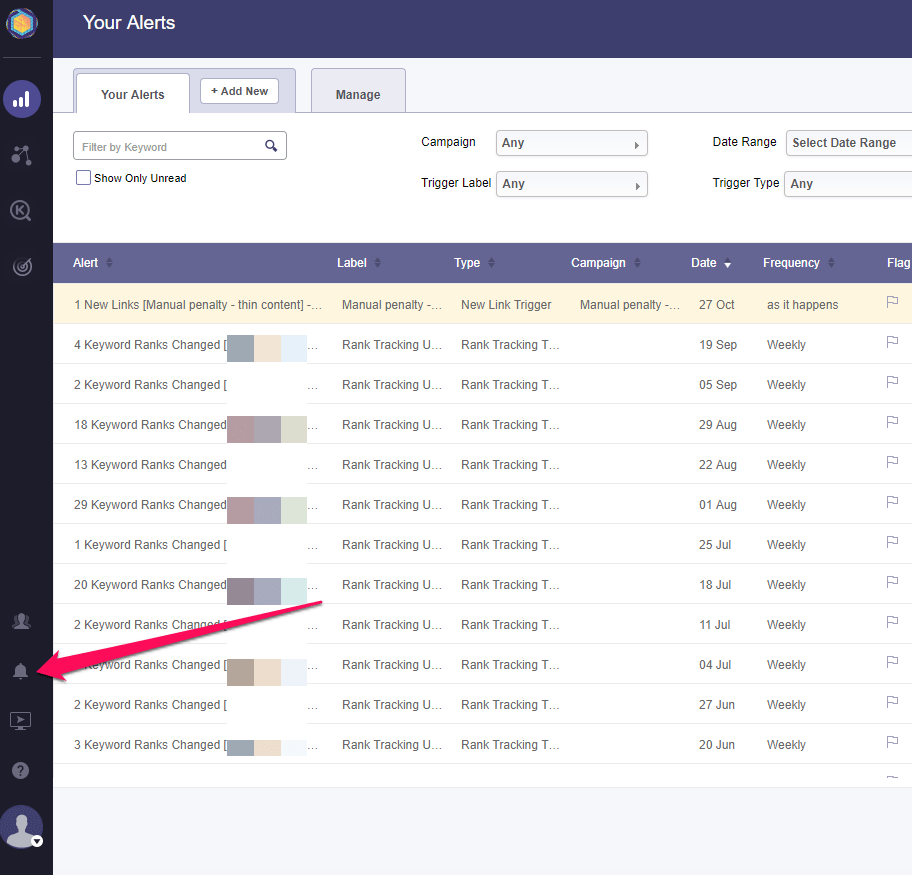
When you enter into your account, on the top of the dashboard you will find several features from which you can choose. You can create or manage your alerts just by hitting the All alerts button that you can easily find on the top of the page, on the right side.
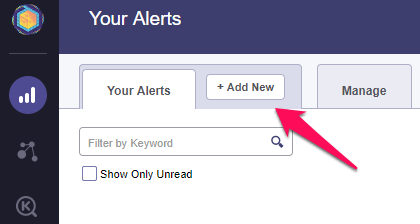
If is the first time you are creating an alert, an image like the one bellow will appear. You will start creating your first alert by pressing Create trigger button.
Customize your triggers
|
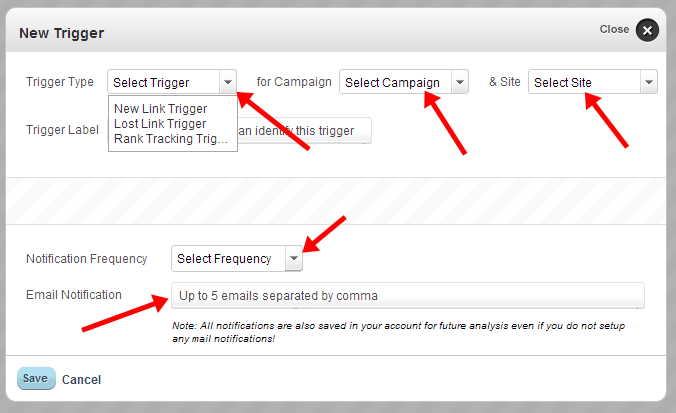
Trigger type |
You can choose between New link trigger, Lost link trigger or Rank Tracking trigger. The selected trigger can be applied to any of your campaigns. Once you’ve selected a trigger type and you hit save, you cannot change your trigger type anymore. |
|
Select campaign Select site |
On the “Select campaign” area, all your campaigns will be listed and you can choose on which one you want to apply the trigger. Considering the campaign chosen, you can also select for which site you want your alert to be applied on. You can pick all of the sites analyzed in the campaign chosen or you can pick only a certain site. |
|
Trigger Label |
Write a unique name so you can easily identify the trigger in the future. |
|
Notification frequency |
Allows you to choose the frequency with which you want to receive notifications. You can choose between:
|
|
Email Notification |
If you want to receive notification via email, you can choose for an Email Notification. You can insert up to 5 emails. Even if you don’t setup any mail, all notifications are saved in your account for future analysis. |
|
Save/Cancel |
All this options will be processed after you hit the Save button. If you press the Cancel button, all your options will be dismissed. |
Advanced options
If you thick the box for Advanced Options, you may customize the trigger and get notified with what matters most to you, according to each trigger type.
New Link Trigger
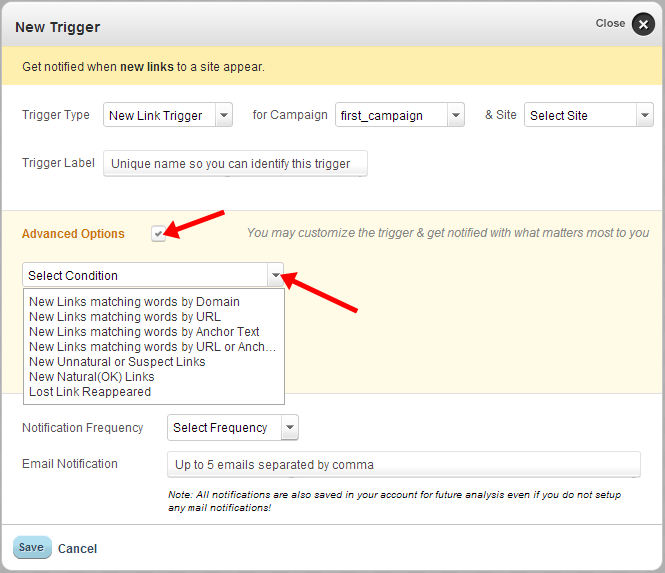
The new link trigger allows you to get notified, with the frequency you choose (as it happens, weekly, monthly) on the new links that appear. You can also customize what type of new links you want to be notified about. You can select a condition for new links, choosing between new links matching words by domain, by URL, by Anchor Text, by URL or Anchor Text. For each of this condition, you’ll have to insert the words you want the analysis to be done on. You can also get informed only about the New Unnatural or Suspect Links, New Natural Links or Lost links that Reappeared.
Lost Link Trigger

The lost link trigger allows you to get notified, with the frequency you choose (as it happens, weekly, monthly) when a site lost links. You can customize what type of lost links you want to be notified about. You can select a condition for lost links, choosing between lost links matching words by domain, by URL, by Anchor Text, by URL or Anchor Text. For each of this condition, an empty box will appear, where you’ll have to insert the words you want the analysis to be done on.
Rank Tracking Trigger
![]()
The rank tracking trigger allows you to get notified when a keywords’ rank changes on Google, Bing or Yahoo. As you choose this type of trigger, several options related to keywords will be posted. In the left box, you will find All Tracked Keywords. This is the keyword list with all the keywords that you are tracking in the selected campaign. This keywords are not triggered. You can move keywords from this section to the right box, where is the trigger keywords area. Only keywords that are in this section will trigger this alert. Add here only the keywords you want to be alerted on.
You can move a keyword in the trigger keywords box by clicking a word and then pressing the Add to Trigger List button. Pressing the Add All button will move all the tracked keywords to trigger keywords list. The same procedure applies if you want to remove keywords from the trigger keywords box. By hitting the Remove all button, all the keywords will be moved back to All tracked Keywords. If you want to remove only a specific keyword, click on that certain word and then hit the Remove from Trigger List button.
You can choose what Search Engine should the trigger apply on. You can pick Any, meaning that the analysis will be made on Google, Bing and Yahoo or you can choose only one of the three.
You can also decide what type of change on rank tracking you want to be informed on: improve, decline or any of the two. You can select, on a range from 1 to 99, on “at least” what number of varied positions you want to be notified about the changes occurred.
Manage Triggers
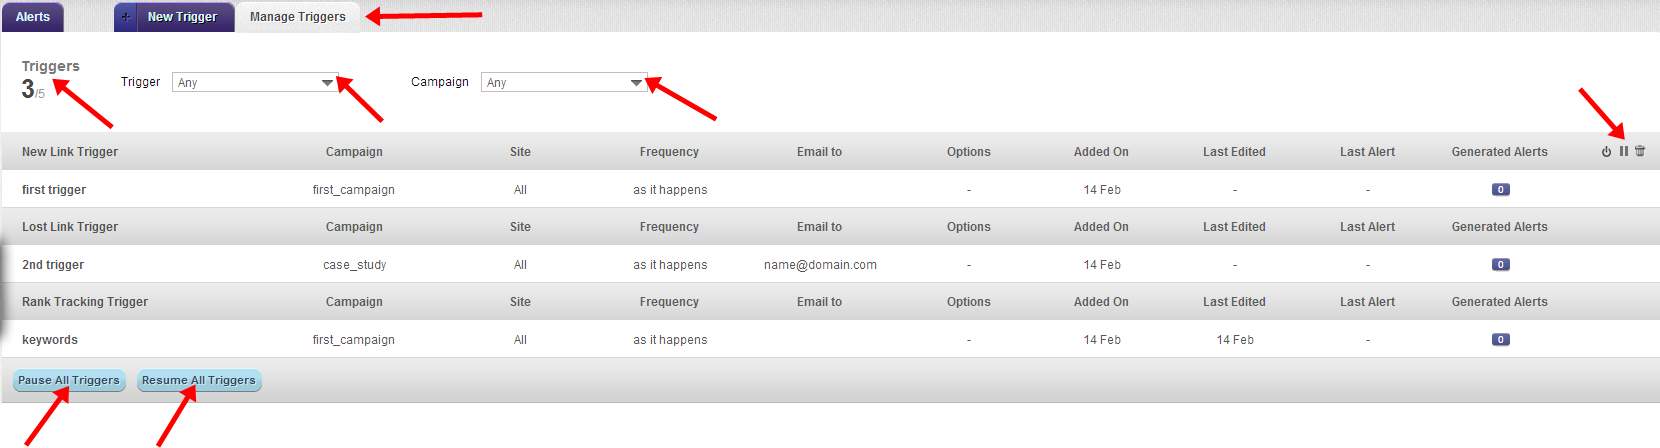
You can easily see how your triggers are settled on the Manage Triggers category. By default, all your triggers will be displayed, no matter the type of trigger or what campaign the triggers are applied on. If you want that only a certain type of trigger or only a specific campaign to be listed, click on the Trigger menu where all types of triggers will be posted. Click on the one you wish to see, then hit the Apply button. The same procedure applies on the campaign type, where you can choose to see any campaign or only a certain one.
On the top left is displayed the number of active triggers from the total of triggers that are available to you, based on your pricing plan.
Under all posted triggers, you have two options that can apply to all of your triggers. You can choose to Pause all triggers, meaning that the alert activity will be put on pause, and you can reverse this action by pressing Resume all Triggers.
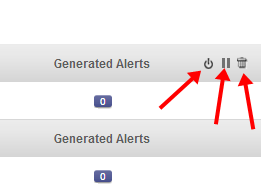
The “pause”, “resume” and “delete” actions can be applied separately to each type of trigger. As you pass over with your cursor across a type of trigger, you will observe that 3 icons will appear on a hover menu. Starting from the left, the first icon will allow you to resume all the triggers of a certain type, the second lets you pause the triggers while the third one will allow you to delete all the triggers of that type.
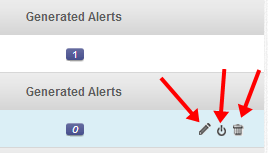
The same procedure can be done for each trigger so you can easily edit, resume or delete any trigger.
Generated alerts
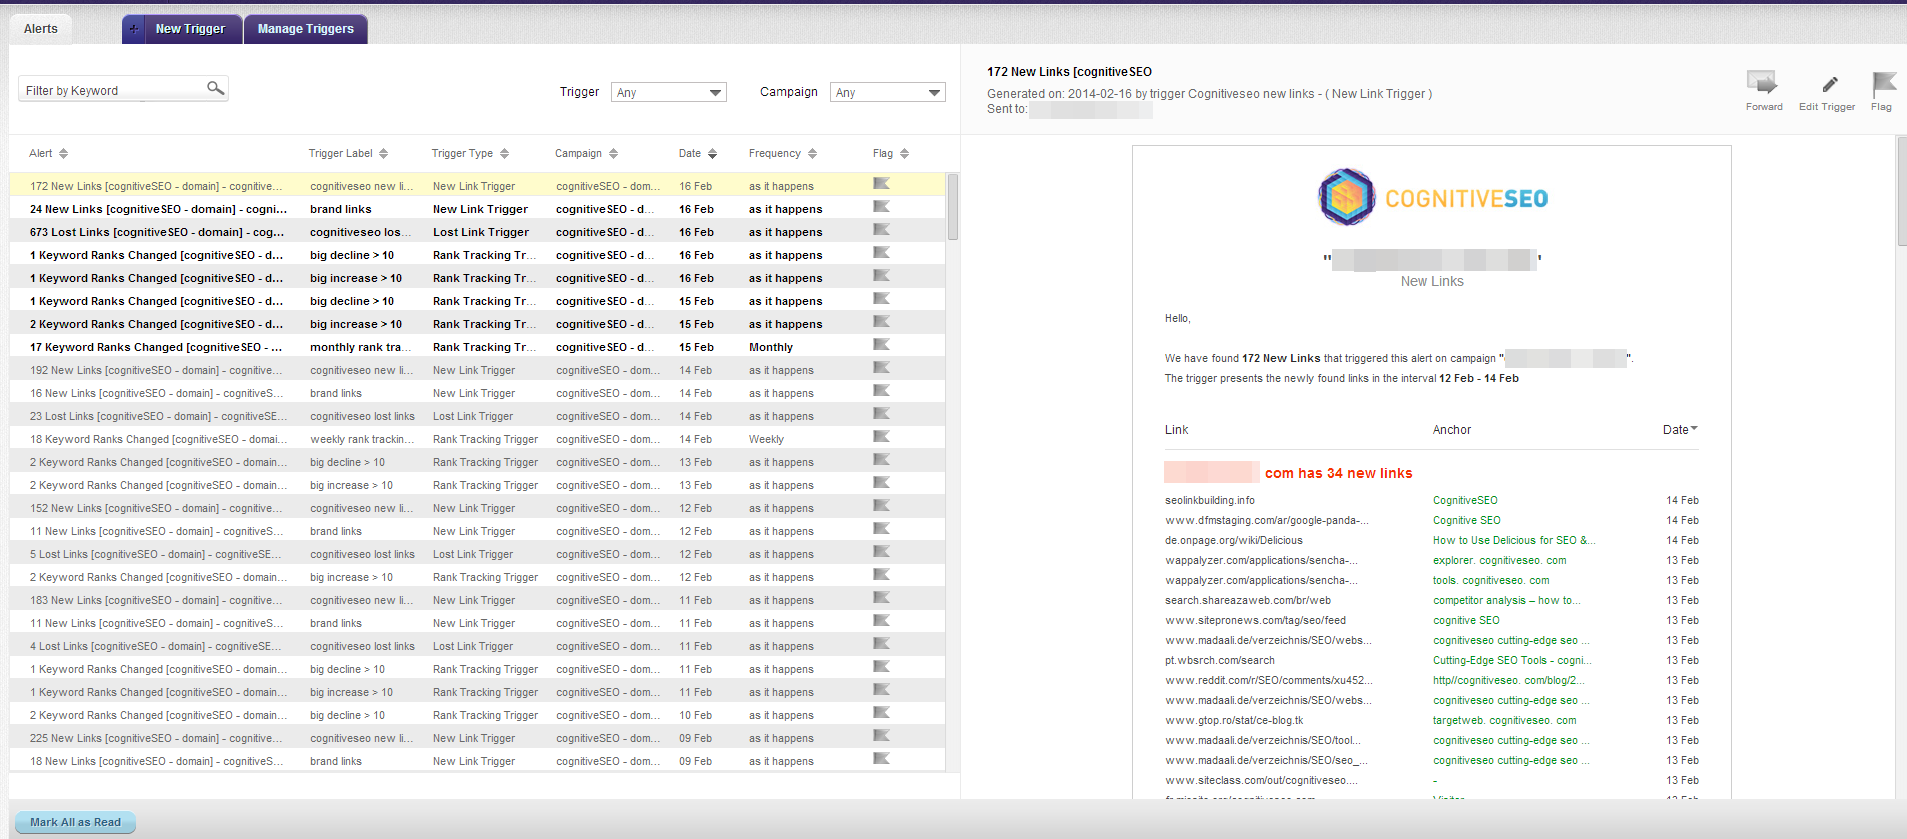
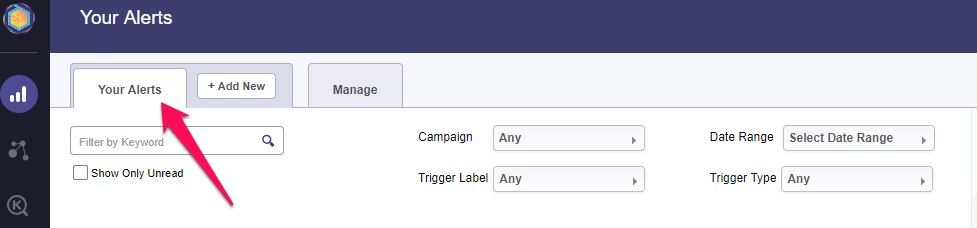
You can easily check your alerts by pressing the Alerts button, as in the image bellow.
Reading your messages
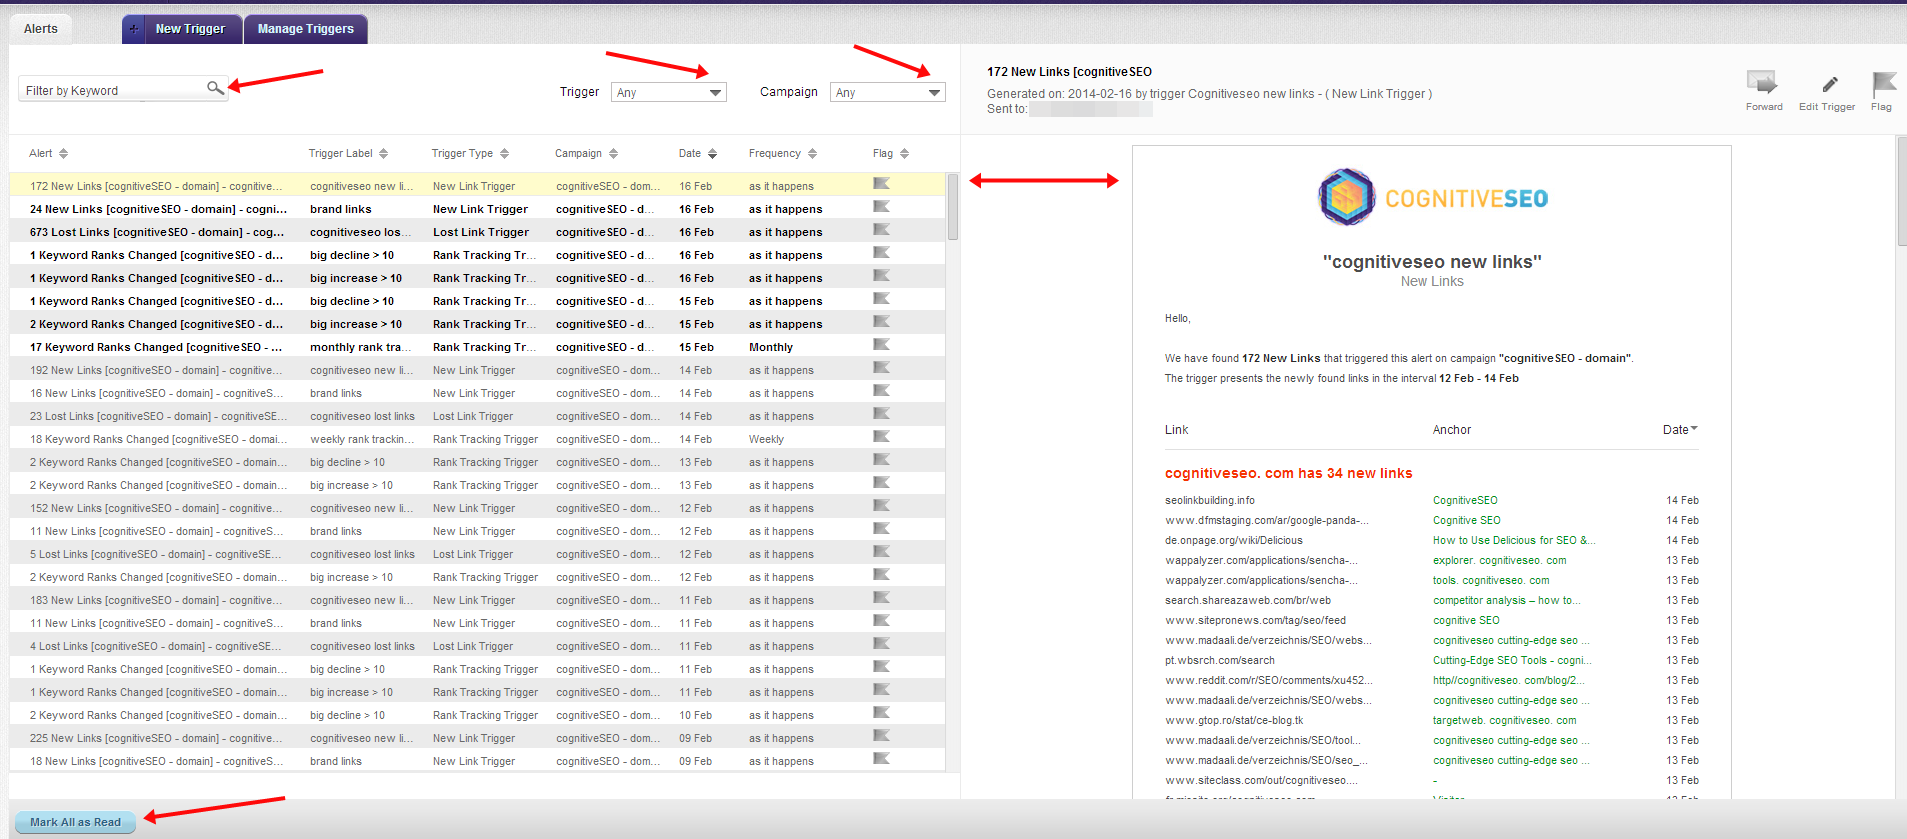
Once you’ve pressed Alerts, all your alerts will be listed. This feature functions as a mail reader, with all your messages listed on your left and the detailed message on your right. In order to read your messages, you can scroll down or you can use the “up” and “down” arrows on your keyboard. The messages that appear in bold are unread messages. You can choose to mark all messages as read by hitting the Mark All as Read button. If you are looking for a particular piece of information or a certain message you can easily search for it with the Filter by Keyword function.
By default, all your alerts will be displayed, for all the triggers and any campaign. If you want that only a certain type of trigger or only a specific campaign to be posted, click on the Trigger menu where all types of triggers will be posted. Click on the one you wish to see, then hit the Apply button. The same procedure applies on the campaign type, where you can choose to see messages from any campaign or only from a certain one.
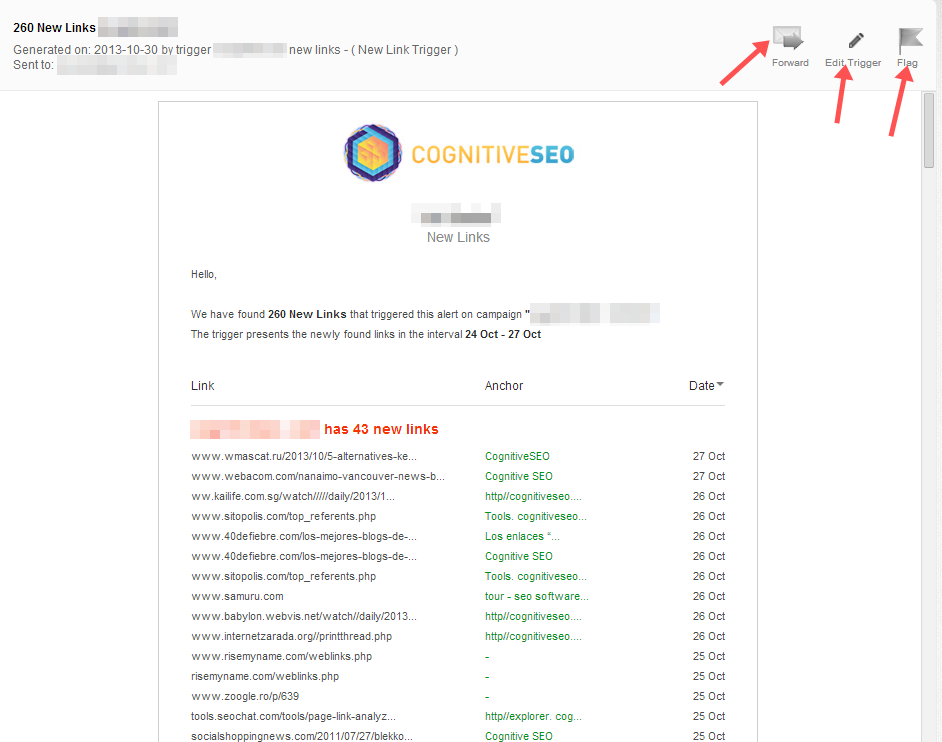
On the right side of your page you have the detailed message listed. For each message, on the right corner, you have the possibility to flag that message, to edit the trigger in relation to which is the message, or to forward to the next message.
Manage your messages
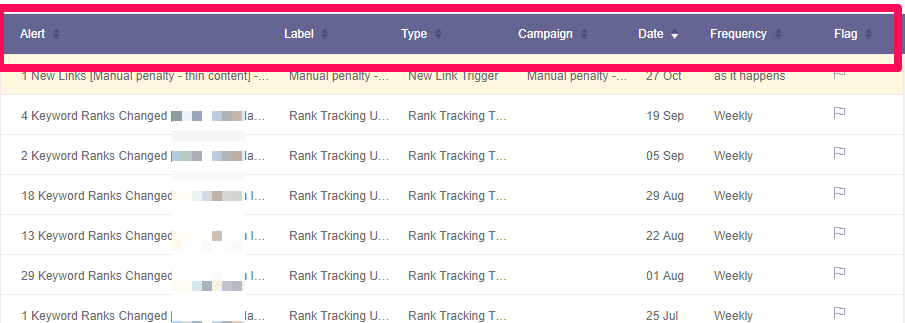
You can easily manage your messages by using the ordering options you find above the message list. You can alphabetically sort your messages by Alert, Trigger Label or Campaign. You can also sort your messages by trigger type (new link triggers are shown first, lost link triggers 2nd and rank tracking trigger 3rd ).
The ordering made according to frequency will put the notifications “as it happens” first, followed by the weekly and monthly notifications. Also, you can sort your messages by date and if you choose to see the flagged messages first, you can do that by sorting your messages according to “Flag”.
Email notifications
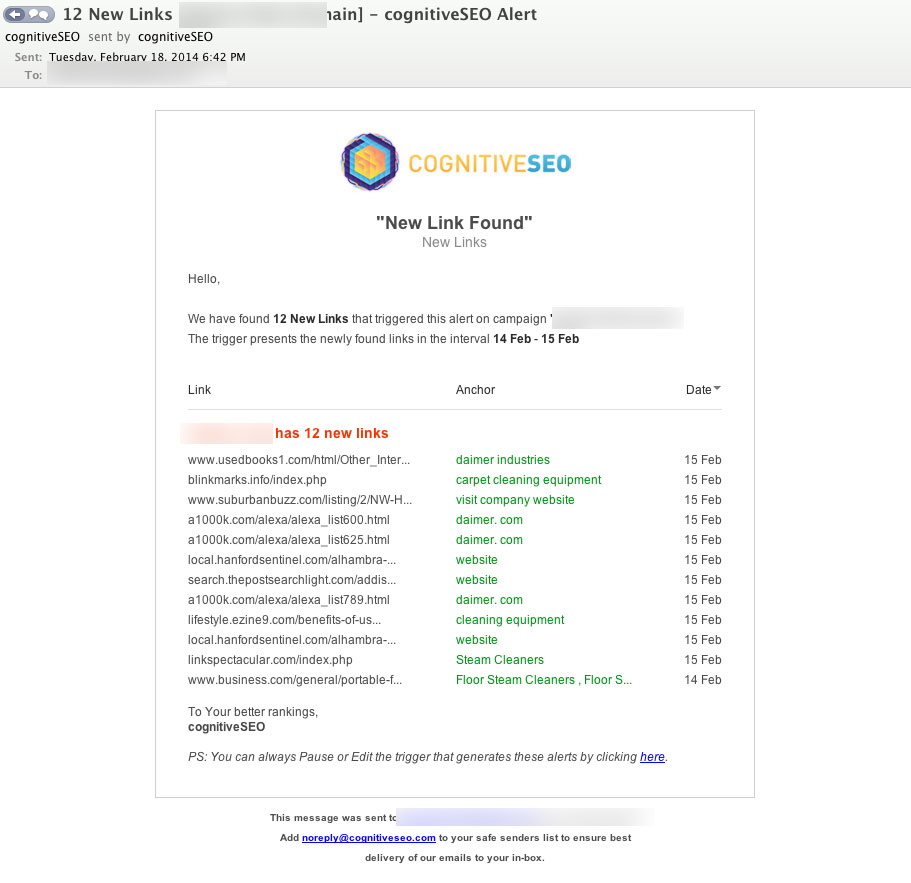
If you opt to also receive all the notification by mail, considering the frequency you chose to be notified, you will get emails containing information related to your customized alerts. You will be able to easily verify information about your campaigns just by reading your mail. You will receive the information you need directly in the email and if you wish to find out more details about the analysis, you can click inside the email body and you will be redirected to your account.
If you don’t want to receive notifications via email anymore, you can go to Edit Trigger and delete the email(s) inserted in the “email notification” field.